Maintaining the luster and beauty of your hardwood floors is essential to preserving the essence of your business space. One highly effective method to achieve this is through staining wood floors. Staining revitalizes your hardwood floor’s look and enhances its durability, making your space more inviting and appealing. It’s a practical and cost-efficient way to breathe new life into your floors. Adding this skillset to your DIY toolkit is invaluable. Stay with us as we delve into the step-by-step process of how to apply stain to a hardwood floor.
Why Stain Hardwood Floors?
Staining wood floors is more than a cosmetic upgrade; it’s a strategic decision that can transform and elevate your business’s aesthetic appeal. In this section, we’ll delve into why hardwood floor staining should be a part of your maintenance routine.
Benefits of Staining for Aesthetic and Protective Purposes.
Staining wood floors can dramatically enhance the overall look of your establishment. It illuminates the natural grain and beauty of the wood and allows you to match the floor’s color with the décor and ambiance of your business. From rich dark hues to gentle lighter tones, staining provides a range of options, giving your space a unique and sophisticated feel.
Beyond aesthetics, staining hardwood floors serves a protective purpose. It protects against wear and tear, resisting scratches, spills, and foot traffic that your business floor inevitably endures. Investing in hardwood floor staining prolongs the lifespan of your floors, maintaining their quality and beauty for many years to come.
Address the Cost-Effectiveness for Small to Medium Business Owners.
Staining wood floors is a cost-effective solution for small to medium business owners. It significantly extends the life of the floors, reducing the need for costly replacements or repairs. Furthermore, applying stain to a hardwood floor can be accomplished with minimal investments in materials and tools, making it an ideal choice for those on a tight budget while adding value to their property.
Materials and Tools Required
Before we plunge into applying stain to a hardwood floor, let’s gather all the essential materials and tools.
Cleaning Supplies
Start with a clean slate by ensuring your floors are free of dust and debris. You’ll need a broom or a vacuum cleaner for this task, which most business owners already have in their cleaning arsenal.
Sandpaper and Orbital Sander
Next, you’ll need sandpaper of varying grits and an orbital sander. These tools are crucial for preparing your hardwood floor for staining by smoothing out any rough patches and removing old finishes.
Wood Stain and Applicator
You’ll require a high-quality wood stain for this task, available in many shades to complement your business’s aesthetics. An applicator, such as a brush or a rag, is essential for evenly spreading the stain on your hardwood floors. Having a few extra applicators on hand for touch-ups or in case of mistakes is ideal.
Protective Gear
Remember to prioritize your safety during the process. Essential protective gear includes gloves to protect your hands from stains, safety glasses to shield your eyes from dust and debris, and a mask to avoid inhaling potentially harmful fumes.
Rags and Plastic Sheeting
Finally, you’ll need clean, lint-free rags to remove excess stains. Plastic sheeting or drop cloths will come in handy for protecting nearby areas from potential spillage or drips.
Collecting these materials and tools beforehand will ensure smooth and efficient staining, adding beauty and durability to your hardwood floors.
Preparing the Floor for Staining
Preparing the floor properly is of utmost importance to yield a beautiful and long-lasting result from your hardwood floor staining project. This integral step sets the stage for the entire process, ensuring that the stain is applied smoothly and uniformly, highlighting your hardwood floors’ innate beauty. Let’s delve into the step-by-step process of preparing your floor for staining.
Step-by-Step Instructions On Floor Preparation
- Clear the Area: Start by removing all furniture and rugs from the room. This ensures you have unobstructed access to the entire floor.
- Clean the Floor: Sweep or vacuum the floor to remove dust, dirt, or debris. This guarantees a smooth surface for sanding and staining.
- Sand the Floor: Using an orbital sander, begin sanding the floor. Start with a coarse-grit sandpaper to remove the old finish and imperfections, then progress to a medium and a fine-grit to achieve a smooth finish.
- Clean Again: Post-sanding, the floor will have dust particles. Vacuum or wipe the floor again to ensure it’s clean before staining.
- Inspect the Floor: Lastly, inspect the floor carefully for any missed spots or imperfections before moving on to the staining process.
The Importance of Preparation for a Successful Stain Application.
The preparation stage is the foundation of a successful staining project. It ensures the hardwood floor is in optimal condition to receive the stain, guaranteeing an even, smooth application that enhances the wood’s inherent beauty. This phase must be revised to avoid irregular staining, diminishing your floors’ overall aesthetic and durability. Hence, meticulous preparation is critical in achieving outstanding results when staining wood floors.
Choosing the Right Stain
Choosing the right stain for your hardwood floor is a crucial step. The stain color can drastically affect the overall ambiance of your business space, so it’s essential to make an informed and strategic choice that aligns with your establishment’s aesthetics.
Overview of Stain Types for Different Hardwood Species
Different stain types have unique characteristics that suit various hardwood species.
Oil-Based Stains: This type of stain is ideal for most hardwood species due to its long-lasting finish and rich color. It penetrates deeply into the wood, accentuating the grain beautifully.
Water-Based Stains: Water-based stains are eco-friendly options that dry quickly and resist fading. They are best suited for hardwoods like maple and cherry, which don’t absorb oil-based stains evenly.
Gel Stains: These stains stay on the wood surface, allowing better color control. They are perfect for woods with tight grains, like pine and birch, as they don’t soak up the stain excessively.
Choosing the right type of stain means considering the hardwood species you’re working with and your aesthetic and durability preferences.
Tips for Choosing the Ideal Stain Color for Your Business
Testing different options is key when it comes to finding the perfect stain for your business ambiance. Here are some tips to guide you:
- Sample Swatches: Purchase small cans of various stain colors and apply them to a piece of scrap wood or an inconspicuous area of your floor. This will give you a clear idea of how the color looks on your particular type of wood.
- Consider Lighting: Remember that lighting can dramatically alter the appearance of the stain color, so observe your test patches under different lighting conditions.
- Factor in Décor: Consider the color of your walls, furniture, and other elements in your business space when choosing a stain color.
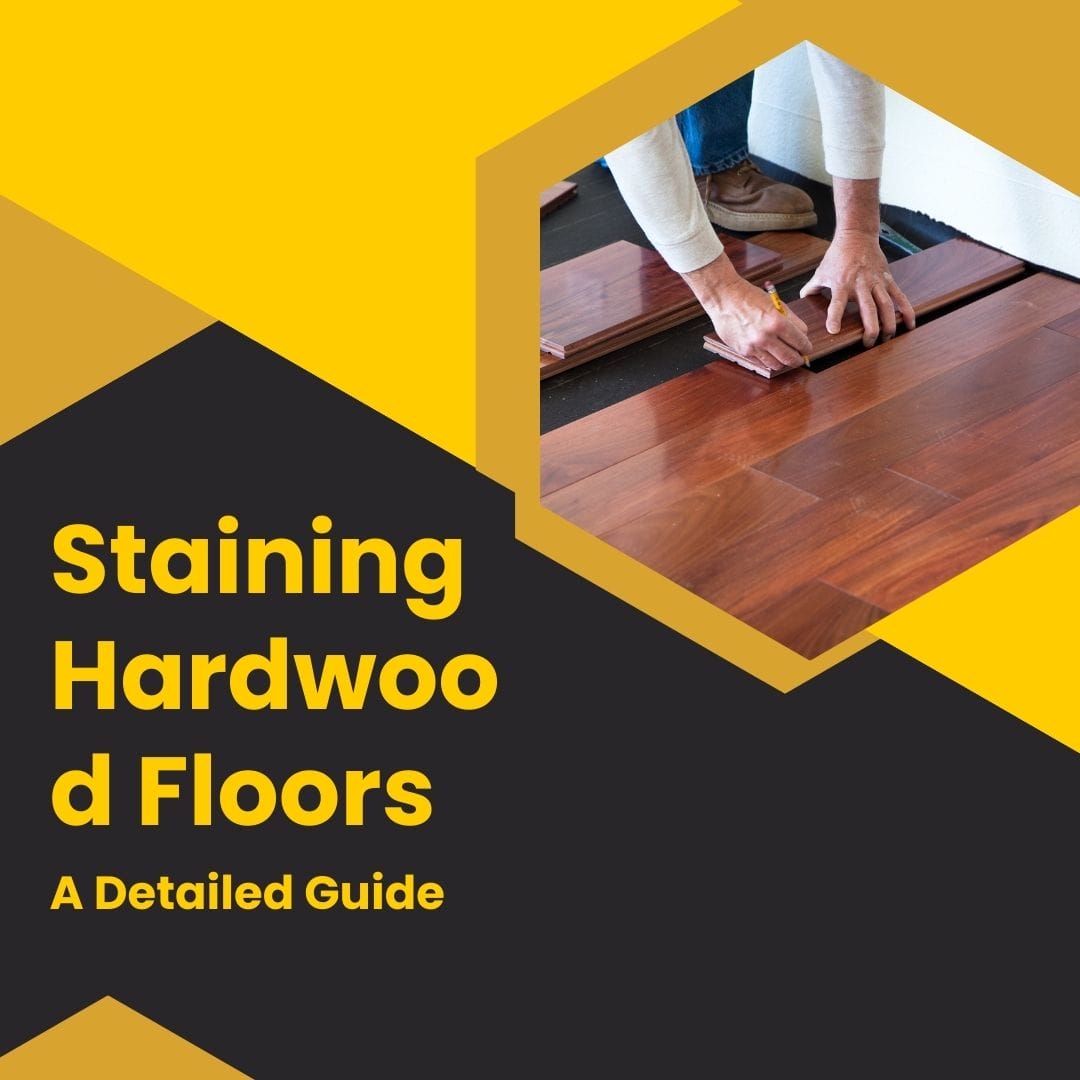
The Staining Process
Now that we’ve covered the necessary preparations and how to choose your stain let’s delve into the heart of the process: staining your hardwood floor. This step is where your business space transforms, enhancing its aesthetic appeal and longevity with each brush stroke.
Detailed Staining Process: Techniques and Precision
Let’s dive into the step-by-step guide on how to apply stain to your hardwood floor, bringing out the charm and character of your business space.
Beginning the Stain Application
Start by thoroughly stirring the stain in the can. Apply the stain to a small, inconspicuous section of the floor using a high-quality, natural bristle brush or a clean, lint-free cloth. Ensure you follow the direction of the wood grain.
Application Technique
Apply the stain liberally, ensuring even distribution. Work in sections, maintaining a wet edge to avoid overlap marks. Don’t allow the stain to puddle; spread it evenly with your applicator.
Letting the Stain Soak
Let the stain soak into the wood for a few minutes for a rich color. The longer it soaks, the darker the color.
Wiping Off the Excess Stain
Using a clean, lint-free cloth, wipe off any excess stain, again following the wood grain. This step ensures the stain penetrates the wood evenly, creating a more uniform color.
Repeating The Process
Repeat this process until the entire floor is stained. Remember, consistency is key to achieving a professional-looking finish when staining wood floors.
Professional Tips for Stain Application and Mistake Prevention
Tip 1: Keep Stirring: Stain pigment often settles at the bottom of the can. To ensure a consistent color throughout your staining project, stir the stain occasionally during the application.
Tip 2: Don’t Rush: Allow ample time for each section to soak before removing the excess. Rushing through this step may result in a lighter color than desired.
Tip 3: Test First: Always perform a test patch before applying the stain to the floor. This way, you can ensure the color and application technique work as expected.
Tip 4: Maintain Consistency: Apply the same amount of stain to every section of the floor to ensure a uniform finish. Variations can lead to noticeable blotches.
Tip 5: Ventilation is Key: Ensure proper ventilation in your workspace. This will help the stain dry faster and more evenly and dissipate fumes.
By following these simple tips, you can achieve a beautifully stained hardwood floor that enhances the aesthetics of your business space.
Drying and Curing Time
Understanding the significance of drying and curing time is fundamental to the success of your hardwood floor staining project. These phases ensure the stain sets properly, enhancing your floor’s durability and aesthetic appeal.
Importance of Adequate Drying and Curing Time
Allowing adequate drying and curing time is crucial when staining wood floors. It ensures the stain penetrates deeply into the wood, resulting in a durable, long-lasting finish. Furthermore, rushing this process might cause the stain to smudge or peel, compromising the aesthetic appeal. Remember, patience pays off when it comes to achieving a beautifully stained hardwood floor.
Business Downtime Planning Advice
Plan for this downtime by scheduling the staining process during a slow business period or over a weekend. If that’s not feasible, consider dividing the project into sections, completing one area at a time. This way, you can maintain some business operations while progressively enhancing your space. Pre-planning is essential to minimize disruption to your business.
Applying the Finish
Now that your hardwood floor boasts the perfect stain, it’s time to seal and protect your work with a finish. Applying a finish is the final step in staining wood floors, giving your floor a glossy shine and protecting it against wear and tear. Let’s dive into it.
Selecting the Ideal Finish for Your Stained Floor
Choosing the right finish depends on the level of durability you want and the desired sheen, from matte to glossy. To apply, pour the finish into a paint tray. Use a high-quality synthetic brush or lamb’s wool roller and start at the farthest corner, working towards the exit. Apply the finish along the grain evenly and without overlap. Let each coat dry thoroughly before sanding lightly and applying the next.
Versatile Finishes and Their Impact on the Business Environment.
Each finish gives a distinct look and possesses varying levels of durability. Oil-based finishes add a warm amber glow and withstand high traffic but take longer to dry and emit strong fumes. Water-based finishes maintain the wood’s natural color, dry quickly, and have low VOC levels, making them ideal for businesses that prioritize indoor air quality. Polyurethane finishes are highly durable, resistant to scratches and stains, and suitable for high-traffic businesses.
Maintenance After Staining
After successfully staining and finishing your hardwood floor, the final step is ensuring proper maintenance. This is pivotal in preserving the stunning new look and extending the lifespan of your business’s newly transformed space.
Tips On Maintaining The Newly Stained Floor
Maintaining your newly stained hardwood floor involves regular cleaning using a dust mop or vacuum to remove dirt and grit that could scratch the surface. Avoid using water or steam cleaners as they can damage the wood. Use mats at entrances to reduce dirt influx. Treat any spills instantly to prevent staining. Annually, consider professional deep cleaning or screening and recoating to revitalize your hardwood floor’s appearance and prolong its lifespan.
Suggest a Maintenance Schedule
A simple yet effective maintenance schedule for busy business owners could include daily sweeping, weekly vacuuming, and monthly cleaning with a wood floor cleaner. Annually, a professional deep clean or recoat may be necessary. Remember to promptly address any spills or scratches. This schedule ensures minimal disruption to your business operations while preserving the allure and longevity of your stained hardwood floors.
Conclusion
In conclusion, learning to apply stain to a hardwood floor and follow through with the process can be an empowering, cost-effective method for business owners. From pre-application tips to understanding drying and curing times, applying the finish, and diligent maintenance, each step is integral to achieving a beautiful, durable, and lasting result. Staining wood floors not only enhances your business environment but also instills a sense of pride in the efforts you’ve dedicated to enhancing your space. Leap, and you might be surprised at what you can achieve with patience and dedication.