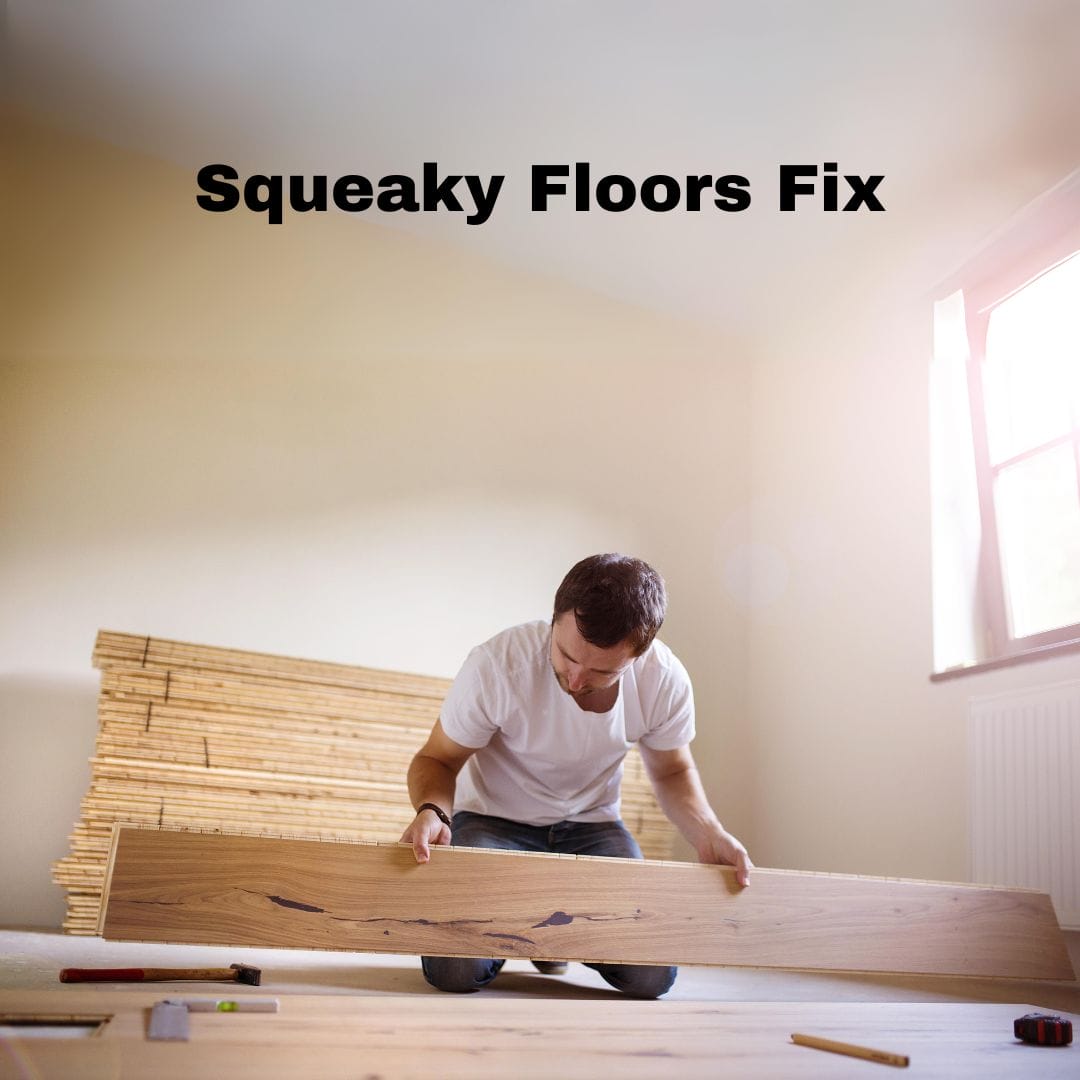
Squeaky floors, a common annoyance for many business owners, can disrupt the calm ambiance of a workspace. But what if you could silence this daily irritation? In this comprehensive guide on how to fix squeaky floors, we’ll explore practical solutions to tackle this pesky issue. Understandably, the relentless squeaking noise underfoot can be distracting and embarrassing, especially in a business setting. However, with our easy-to-follow steps, you can restore peace to your establishment. So, read on to discover how a simple squeaky floor repair can transform your business environment.
Understanding Squeaky Floors
Squeaky floors are more than just a nuisance; they are a symptom of an underlying issue with your floor’s structure. Before we delve into how to fix squeaky floors, let’s first understand what causes this annoying problem and why addressing it is crucial for maintaining a professional business environment.
Common Causes of Squeaky Floors.
Squeaky floors typically result from gaps between the subfloor and the floor joists, similar to the issues addressed in refinishing bamboo flooring guide. Over time, as the building materials contract and expand due to changes in temperature or humidity, these gaps widen, causing the floor to creak when walked upon.
Learn about Which Finish is Right for Your Hardwood Floors
Another common cause is the use of improper fasteners during the floor’s installation. If the nails or screws are too short or not adequately secured, they can loosen over time and create squeaks as the subfloor shifts against the joists. Similarly, if the underlayment or subfloor material is of low quality, it can degrade and lead to squeaky floors.
Lastly, in older buildings, the wear and tear from years of use can cause the floorboards to become loose, contributing to the squeaking sounds. Understanding these causes is the first step in learning how to fix squeaky floors.
Find out How to Repair Dents in Hardwood Floor
Importance of Fixing Squeaky Floors for Business
A noisy, squeaky floor can tarnish the professional image of your business. Even the subtlest sounds, like a squeaky floor, can distract employees and clients alike, disrupting their concentration and potentially negatively influencing their perception of your business. Creating an environment that is comfortable and conducive to productivity is integral, and a squeaky floor simply doesn’t fit that bill.
By fixing this issue, you improve the overall aesthetic of your premises and illustrate your commitment to maintaining a high-quality workspace. Remember, the devil is in the details; even something as seemingly minor as a squeaky floor can significantly impact your business.
Discover 7 Wood Floor Patterns That Never Get Old
Fixing Your Squeaky Floors – A Complete Guide
Let’s now dive into an actionable, step-by-step guide on how to fix squeaky floors to empower you to rectify this nuisance and maintain a professional, noise-free workspace.
Necessary Tools and Materials
You’ll need a specific set of tools and materials to embark on your mission to fix squeaky floors. Use a hammer, drill, screws, joist finding tool, shims, and a specialized squeak repair kit, as detailed in using Swiffer on vinyl plank flooring available at most hardware stores. Ensure you have good quality measuring tape and safety gear like gloves, safety glasses, and knee pads for comfort.
Learn more about Best Steam Cleaner for Pets
Safety Tips and Precautions
Before you start, it’s essential to take certain safety precautions. Always wear appropriate safety gear, including gloves and safety glasses, to protect yourself from dust and debris. Ensure the area is well-lit to avoid any missteps or accidents.
If you’re working on upper floor levels, be mindful not to put too much pressure on areas with weak support, as this could lead to structural damage or, in the worst case, a floor collapse. When using electric tools, such as drills, ensure they are in good working condition and follow the manufacturer’s instructions to avoid any risk of electric shock.
Remember, if the task seems too daunting or the squeaky floor issue persists after your repair attempts, it’s best to consult a professional. It might seem like an additional expense, but ensuring your workspace’s safety and structural integrity is paramount.
Fixing a squeaky floor can be a DIY task, but always prioritize safety over cost efficiency. After all, your business’s security and professionalism are on the line.
Identifying the Source of the Squeak
Before we dive into how to fix squeaky floors, it’s crucial to accurately identify the squeak’s source. Pinpointing the precise area causing the noise will enable targeted and effective floor repair, saving you unnecessary work and ensuring the bothersome squeaking is eliminated for good. Let’s delve into the steps in identifying your squeaky floor’s root cause.
Here’s How to Refinish Hardwood Floors
Guide to Locate the Exact Spot Of the Squeak.
The first step in fixing a squeaky floor is finding the exact spot causing the noise. Start by walking around the area where the squeak is most noticeable. Have someone else walk while you listen to pinpoint the source. You can use this same method to locate the squeak for spaces above a basement or crawl space. Mark the identified spots with chalk or masking tape for reference during repair.
Consider What is LVT Flooring.
Different Sounds on the Floor
Different sounds emanating from your floor can indicate various problems. A high-pitched squeak often suggests that your floorboards or subfloor are rubbing against nails due to a lack of support or loose connections. On the other hand, a low creaking or groaning noise could point to your floorboards being under stress, possibly due to changes in humidity.
When you hear a sharp popping sound, it often signifies that nails or screws are being forced back out of their holes, indicating they were not properly secured during installation. Finally, a constant sound across a larger area might reveal a subfloor that’s lost its attachment to the joists. Understanding these sounds is crucial in diagnosing the root cause of the problem, leading you to the most efficient way to fix squeaky floors.
Read about Should You Steam Clean Hardwood Flooring.
Fixing Squeaky Floors from Below
When you have pinpointed the source of the squeaking and are ready to move forward, the next phase of your quest to fix squeaky floors commences. This section will provide an in-depth guide on how to fix squeaky floors from below, a practical method when you have access to the underside of your flooring via a basement or crawl space. Let’s delve into the specifics.
Step-by-Step Instructions
- Locate the Squeak: Identify the squeak source from downstairs by having someone walk on the floor above.
- Tighten Boards: Using your drill, insert a screw into the joist and floorboard to tighten them together. Ensure not to penetrate the floor surface.
- Use Shims: If a gap exists between the joist and the floorboard, gently insert a shim and cut off any excess. Be careful not to force it as it may lift the floorboard, worsening the squeak.
- Apply Adhesive: For stubborn squeaks, apply some construction adhesive in the gap before inserting the shim.
- Check Effectiveness: Check the area to see if the squeak has been eliminated. If not, repeat the process.
Professional Tips for Prime Durability
- Choose High-Quality Materials: Invest in top-grade screws, shims, and adhesives for best results. High-quality materials ensure a longer-lasting fix.
- Check for Structural Issues: If the squeak persists despite your efforts, consider hiring a professional to check for underlying structural issues.
- Keep Tools Clean: Clean your tools before and after use. Dirty tools could damage your floor and compromise the repair.
- Use Adequate Lighting: Adequate lighting while working prevents mistakes and ensures the job is done correctly.
- Work Slowly: Don’t rush the job. Taking your time ensures you do the job correctly and safely.
- Inspect Regularly: Regular inspection and maintenance of your floors can prevent future squeaks, a principle also important in cleaning hard-to-reach vents.
Addressing Squeaky Floors from Above
Addressing a floor squeak issue may require a top-down approach, especially when the underlying space is inaccessible. This section will explore how to fix squeaky floors from above, detailing the process and providing valuable tips for a successful and long-lasting repair.
Accessing the Floor from Above
Fixing squeaky floors from above requires specific tools and materials, including a repair kit designed for this purpose.
- Identify the Squeak: As with the prior approach, first, pinpoint the exact location of the squeak.
- Secure the Subfloor: Secure the subfloor to the floor joist using the repair kit. These kits often include specially designed screws that break off below the surface, leaving a filled hole that can be concealed with a matching color putty.
- Test the Area: Walk on the floor to confirm that the squeak has been eliminated.
It is a relatively straightforward process, but care must be taken to avoid damaging the floor surface, especially when dealing with hardwood or finished veneers.
Cover The Use of Special Kits and Tools
Specialized commercial-grade kits and tools can be instrumental in effective squeaky floor repair for business settings where aesthetics and durability are equally important. These kits are designed to address common flooring issues experienced in businesses, offering high-quality, reliable solutions that minimize downtime and ensure a professional finish. Let’s explore some of these special kits and how they can aid you in your quest to fix squeaky floors.
Special Considerations for Carpeted Floors
Carpeted floors can present unique challenges when fixing squeaky floors due to the additional material layer. However, with the right techniques and tools, you can successfully silence the squeaks without damaging your carpet. Let’s explore special considerations and methods for squeaky, carpeted floors.
Explore more about Are Polypropylene Rugs Safe for My Vinyl Flooring.
Challenges And Solutions for Squeaky Floors Under Carpeting.
While carpeted floors provide a comfortable and aesthetic appeal, they add a layer of complexity when fixing squeaky floors. The carpeting and padding can obscure the exact source of the squeak, making it a bit trickier to pinpoint. Additionally, care must be taken to avoid damaging the carpet during repair.
Nevertheless, specialized tools like a carpet repair kit can be used to fix the squeak without causing any harm to your carpet. These kits usually contain aligning pins and depth control devices that allow you to secure the subfloor to the joists through the rug. After the repair, the pins can be easily removed, and the carpet can return to its original state, effectively eliminating the squeak without leaving any visible signs of repair. Regular inspection and professional cleaning can also prolong the life of your carpet and prevent future squeaks.
Maintenance After the Repair
To maintain the appearance of your carpet post-repair, regular vacuuming is essential to remove dust and prevent fibers from matting. Avoid direct sunlight exposure, which can fade the carpet color. Promptly clean spills to prevent staining, using carpet-specific products to avoid damage. Lastly, consider professional carpet cleaning annually to deep clean and rejuvenate your carpet, thereby maintaining its aesthetic appeal.
Dealing With Squeaky Stairs
Squeaky stairs can be as bothersome as squeaky floors, creating an unwanted chorus every time you ascend or descend. In this section, we will share insights on how to fix squeaky stairs, ensuring tranquility is restored in your business premises.
Identify the Source of the Squeak
The first step in dealing with squeaky stairs is to identify the exact location of the noise. Walk up and down the stairs to pinpoint the problematic steps. The squeak typically originates from loose treads, risers, or stringers that rub together when weight is applied.
Tighten Loose Components
Once you’ve identified the offending step, try to tighten any loose components. This can be done using screws or nails, but use the right size to avoid damaging the wood. If the squeak comes from the riser and tread meeting point, apply a bead of construction adhesive before screwing to strengthen the bond.
Use Specialized Kits
There are specialized kits available designed specifically to fix squeaky stairs. These kits usually contain brackets and screws that can secure loose treads and risers, thus eliminating the squeak. They are easy to install and require no professional expertise.
Fill in Gaps
If gaps have formed between the stair components, filling them with wood filler can help eliminate squeaks. Ensure the filler matches the color of the stairs for a seamless finish. Let it dry completely before walking on the stairs.
Seek Professional Help
If the squeak persists or the stairs are significantly damaged, consider professional help. A carpenter or repair specialist can assess the situation and provide a comprehensive solution to restore safety and silence to your stairs.
Remember, regular inspection and prompt repair of your stairs eliminate annoying squeaks and ensure the safety and longevity of your stairs.
Preventative Measures And Long-Term Care
Proactive intervention and regular maintenance are key to preventing squeaky floors and ensuring long-term durability. This section will delve into preventive measures and long-term care strategies to keep your feet and stairs in optimal condition, saving you time, effort, and resources in the long run.
Tips On Preventing Future Squeaks And Maintaining Floors.
To prevent future squeaks in your floors, ensure regular upkeep and maintenance. Humidity control is crucial as extreme moisture variations can cause the wood to expand or contract, leading to squeaks. Use a dehumidifier in damper months and a humidifier during drier periods to maintain a consistent atmospheric balance.
Here’s a guide on How to Repair Laminate Floor.
Conduct regular floor inspections to identify potential problem areas early. Addressing minor issues can prevent larger problems in the future.
If you’ve installed new flooring, ensure the subfloor is securely attached to the floor joists. Using screws instead of nails during installation can provide a tighter connection, reducing the likelihood of future squeaks.
Lastly, remember that professional help is invaluable for regular check-ups and complex issues. An experienced eye can spot and rectify potential problems early, prolonging the lifespan of your floors.
Regular Maintenance To Avoid Disruptions.
For business owners, regular maintenance of floors and stairs is not just about aesthetics or noise reduction. It’s a fundamental aspect of ensuring smooth operations. Ignoring minor issues can lead to major disruptions later, potentially impacting your business’s routine and causing safety hazards. A well-maintained floor environment enhances your business’s image and ensures an uninterrupted, safe, and pleasant experience for employees and customers.
Conclusion
In conclusion, understanding how to fix squeaky floors and stairs is crucial for maintaining a professional and comfortable environment in your business premises. Regular inspections, tightening loose components, using specialized kits, and, if needed, seeking professional help are all effective strategies to combat this issue. Preventative measures and long-term care can save you time, effort, and resources. We encourage all business owners to pay attention to this seemingly minor issue. Nip the squeak in the bud before it escalates into a major disruption. Your swift action will keep your business premises safe, aesthetically appealing, and, most importantly, squeak-free.