In the quest for a pristine, welcoming home, the power of DIY cleaning techniques cannot be overstated. Gone are the days when professional-grade cleanliness was solely the domain of experts. Today, with the right knowledge and tools, anyone can transform their living spaces into a haven of cleanliness and comfort. “Mastering DIY Cleaning Techniques for a Sparkling Home” is your comprehensive guide to achieving just that – a sparkling abode using methods and solutions crafted right at your fingertips.
This guide delves into the world of DIY cleaning, unraveling the secrets behind efficient, eco-friendly, and cost-effective home maintenance. From leveraging the versatility of power washers in ways you never imagined to concocting homemade glass cleaners that leave your windows and mirrors crystal-clear, we cover it all. We also tackle the persistent challenge of stubborn stains, guiding you through mixing the perfect solutions to keep your floors spotless and inviting.
Whether you’re a seasoned DIY enthusiast or a beginner eager to learn, this article is tailored to enhance your cleaning repertoire. Not only will we explore the essentials of DIY cleaning, but we’ll also connect you to specialized resources – our child articles, each focusing on unique aspects of home cleaning. These include creative uses of power washers, recipes for homemade glass cleaners, and the ultimate guide to stain-busting solutions for your floors.
Prepare to embark on a journey that will elevate your home cleaning game to professional levels, all while keeping it fun, eco-friendly, and deeply satisfying. Welcome to the art and science of DIY cleaning – where every sweep, scrub, and wipe brings you closer to the sparkling home you deserve.
The Essentials of DIY Home Cleaning
In today’s fast-paced world, maintaining a clean and healthy home is more important than ever. DIY home cleaning has emerged as a popular, cost-effective, and satisfying way to achieve this. But where do you start? Understanding the basic principles and familiarizing yourself with essential tools and ingredients can set you on the path to a cleaner, more harmonious home.
Understanding the Basics of DIY Cleaning
DIY home cleaning is about more than just saving money; it’s a holistic approach that combines efficiency, sustainability, and personalization. By doing it yourself, you have complete control over the ingredients and methods used, ensuring they are safe for your family and the environment. This approach also allows for customization based on your home’s specific needs and your personal preferences.
The Key Principles
- Start with a Plan: Tackle your cleaning tasks methodically. Create a cleaning schedule that breaks down tasks into manageable chunks, whether daily, weekly, or monthly.
- Declutter First: A cluttered space complicates cleaning. Regularly decluttering simplifies the process and enhances the effectiveness of your cleaning efforts.
- Focus on High-Traffic Areas: Prioritize areas that accumulate the most dirt and germs, such as kitchens, bathrooms, and entryways.
- Use the Right Tools and Techniques: Different surfaces require different tools and techniques. Knowing what works best for each surface ensures efficient and safe cleaning.
- Eco-friendly and Health-Conscious: Opt for natural, non-toxic ingredients wherever possible to promote a healthy living environment.
Essential Tools
- Microfiber Cloths: These cloths are perfect for dusting and polishing surfaces without leaving streaks or lint behind.
- Sponges and Scrub Brushes: Various shapes and sizes are useful for tackling different cleaning tasks, from washing dishes to scrubbing bathroom tiles.
- A Quality Vacuum Cleaner: Essential for carpets and upholstery, a good vacuum can also be used on floors.
- Mop and Bucket: For cleaning hard floors. A flat mop with a microfiber pad is great for hardwood and tile floors.
- Spray Bottles: Useful for homemade cleaning solutions.
Commonly Used Ingredients
- White Vinegar: An all-purpose cleaner, effective for killing bacteria and removing grime.
- Baking Soda: Great for scrubbing and neutralizing odors.
- Lemon Juice: Natural bleach and deodorizer, perfect for cutting through grease and adding a fresh scent.
- Castile Soap: A gentle yet effective soap that can be used for everything from handwashing dishes to mopping floors.
- Essential Oils: Add a pleasant aroma and can have antibacterial properties. Popular choices include lavender, tea tree, and lemon.
DIY Cleaning Solutions
- All-Purpose Cleaner: Mix equal parts water and vinegar, add a few drops of essential oil for fragrance.
- Glass Cleaner: Combine 2 cups of water, ½ cup white or cider vinegar, and ¼ cup rubbing alcohol with a 70% concentration.
- Carpet Freshener: Mix baking soda with a few drops of essential oil, sprinkle on the carpet, let sit, and then vacuum.
Innovations in DIY Cleaning Techniques
In the dynamic world of home maintenance, DIY cleaning techniques have evolved beyond traditional methods, embracing innovation and technology. This evolution has made cleaning not only more efficient but also more enjoyable. This article explores the cutting-edge cleaning methods and tools that are revolutionizing the way we care for our homes, with a special focus on the versatile and powerful tool known as the power washer.
Embracing Modern Cleaning Methods
Today’s DIY cleaning landscape is characterized by a shift towards more sophisticated, technology-driven solutions. These innovations aim to reduce effort, increase effectiveness, and often, prioritize eco-friendly practices. From automated gadgets to advanced cleaning agents, the modern homeowner has an array of options to choose from.
The Benefits of Innovative Cleaning
- Efficiency: Advanced tools and methods save time and effort.
- Effectiveness: Enhanced technology often means deeper, more thorough cleaning.
- Environmentally Friendly: Many modern tools and cleaning solutions are designed with sustainability in mind.
- Customization: Tailor your cleaning process to your specific home and needs.
Power Washers: A Deep Dive into their Versatility
Power washers, also known as pressure washers, are a prime example of cleaning innovation. These devices use high-pressure water spray to remove dirt, dust, grime, and mold from surfaces and objects such as buildings, vehicles, and concrete surfaces.
Types of Power Washers
- Electric Power Washers: Ideal for light to medium-duty tasks. They are quieter and more suitable for indoor or residential use.
- Gasoline Power Washers: More powerful and suitable for heavy-duty outdoor tasks.
Unconventional Uses of Power Washers
- Cleaning Outdoor Furniture: Easily remove dirt and mildew from patio furniture.
- Prepping Surfaces for Painting: Remove peeling paint from walls or fences with ease.
- Cleaning Vehicles: An efficient way to wash cars, bikes, and boats.
- Gutter Cleaning: Clear out leaves and debris from gutters without using a ladder.
- Graffiti Removal: Effective in removing unwanted graffiti from walls.
Safety First
While power washers are incredibly effective, they require careful handling to ensure safety. Always read the manufacturer’s instructions and wear appropriate protective gear, such as goggles and gloves.
Eco-Friendly and Homemade Cleaning Solutions
In an era where environmental awareness is paramount, the shift towards eco-friendly and homemade cleaning solutions is more than just a trend; it’s a vital aspect of sustainable living. This article emphasizes the significance of using green cleaning products and offers a guide to making your own effective, eco-friendly glass cleaners.
Why Go Green with Your Cleaning?
- Health Benefits: Traditional cleaning products often contain harsh chemicals that can be harmful to your health. Eco-friendly products reduce the risk of allergies, respiratory problems, and skin irritations.
- Environmental Impact: Conventional cleaners can contain chemicals that are detrimental to the environment. Using green products helps in reducing pollution to our waterways and air.
- Safety: Eco-friendly cleaning products are generally safer for use around children and pets.
- Cost-Effective: Many eco-friendly solutions can be made with inexpensive, everyday household items.
The Basics of Homemade Cleaners
Making your own cleaning products is simpler than it sounds. The key lies in using natural ingredients that are known for their cleaning properties. Common ingredients include white vinegar, baking soda, lemon juice, olive oil, and essential oils.
Homemade Glass Cleaner Recipes
Glass surfaces, from windows to mirrors, can be kept sparkling clean without the use of harsh chemicals. Here are some DIY glass cleaner recipes:
Recipe 1: Vinegar and Water Solution
- Ingredients:
- 1 part white vinegar
- 1 part water
- Instructions: Mix the ingredients in a spray bottle. Spray onto glass surfaces and wipe clean with a microfiber cloth or newspaper for a streak-free finish.
Recipe 2: Lemon Juice Cleaner
- Ingredients:
- 2 tablespoons lemon juice
- 1 liter of water
- Instructions: Combine the lemon juice and water in a spray bottle. This solution not only cleans effectively but also leaves a fresh, citrus scent.
Recipe 3: Cornstarch Glass Cleaner
- Ingredients:
- ¼ cup vinegar
- ¼ cup rubbing alcohol
- 1 tablespoon cornstarch
- 2 cups water
Instructions: Mix all ingredients in a spray bottle. Shake well before each use, as the cornstarch may settle at the bottom. This recipe is especially effective for removing fingerprints and smudges.
Tips for Effective Glass Cleaning
- Use a Microfiber Cloth: These cloths are gentle on glass and don’t leave lint behind.
- Avoid Direct Sunlight: Cleaning glass in direct sunlight can cause streaking.
- Buff for Shine: After cleaning, buff the glass with a dry cloth for extra shine.
Tackling Specialized Cleaning Challenges: Solutions for Tough Stains and Problem Areas
When it comes to keeping your home clean, some challenges seem almost insurmountable. Tough stains and problem areas can be daunting, leaving many homeowners at a loss. This article aims to demystify these specialized cleaning challenges, providing effective solutions and techniques for tackling even the most stubborn stains on various surfaces.
Understanding the Nature of Tough Stains
Before diving into solutions, it’s essential to understand what makes certain stains so challenging. Factors such as the stain’s composition, the surface material, and the length of time the stain has set can all influence the cleaning approach. For instance, oil-based stains require different treatment than protein-based stains, and delicate surfaces like marble need a gentler approach than more resilient ones like ceramic.
Stain-Busting Solutions for Various Surfaces
Carpet and Upholstery
- For Fresh Stains: Blot immediately with a clean, dry cloth to absorb as much of the spill as possible. Avoid rubbing, as this can push the stain deeper into the fibers.
- For Set-In Stains: Create a solution of one tablespoon dish soap, one tablespoon white vinegar, and two cups of warm water. Apply to the stain, let sit for 5-10 minutes, then blot gently with a clean cloth.
Hardwood Floors
- Water Stains: Gently rub the stain with a cloth dampened with a solution of water and white vinegar.
- Dark Stains (like pet urine): Apply a paste of baking soda and water, let it sit overnight, and then gently wipe away.
Kitchen Surfaces (Countertops, Stovetops)
- Grease Stains: Use a mixture of baking soda and water to create a gentle abrasive paste. Apply to the stain, let sit for a few minutes, then wipe away.
- Burnt-on Food: Soak the area with warm, soapy water, then scrape away the residue gently with a plastic scraper or spatula.
Bathroom Surfaces (Tiles, Grout)
- Mold and Mildew: Mix one part hydrogen peroxide with two parts water in a spray bottle. Spray on the affected area, wait an hour, then rinse and wipe clean.
- Soap Scum: Use a solution of equal parts white vinegar and dish soap. Apply, let sit for 15 minutes, then scrub with a non-abrasive brush and rinse.
Glass and Mirrors
- Water Spots: Rub the spots with a cloth soaked in white vinegar or lemon juice, then dry with a clean cloth.
- Fingerprints and Smudges: Use a solution of one part vinegar to four parts water, spray on the glass, and wipe with a microfiber cloth.
Additional Tips for Successful Stain Removal
- Test a Small Area First: Always test cleaning solutions on a small, inconspicuous area to ensure they don’t cause damage.
- Use the Right Tools: Soft brushes, microfiber cloths, and sponges are usually safe for most surfaces.
- Be Patient: Some stains may require repeated treatments or longer soaking times.
Power Washing: A Deep Dive into Techniques and Safety
Power washing, also known as pressure washing, is an incredibly effective method for cleaning various areas around the home. This article provides an in-depth exploration of power washing techniques suited for different home areas, alongside essential safety tips and best practices to ensure both effective and safe cleaning.
What is Power Washing?
Power washing uses high-pressure water spray to remove dirt, grime, mold, and other debris from surfaces such as buildings, vehicles, and concrete. The power of the water jet does the heavy lifting, making it an efficient tool for tough cleaning jobs.
The Right Equipment
Choosing the correct power washer is crucial. Power washers come in various sizes and pressure ratings, measured in PSI (pounds per square inch). For most home applications, a medium-duty power washer (2000-2800 PSI) is sufficient.
Techniques for Different Home Areas
Driveways and Walkways
- Technique: Use a sweeping motion, keeping the nozzle at a consistent distance from the surface. For stubborn stains, pre-treat with a detergent.
- Tip: Use a surface cleaner attachment for a more uniform and efficient cleaning.
Decking and Patios
- Technique: Start with a low-pressure nozzle to avoid damaging wood or pavers. Move in the direction of the decking boards.
- Tip: Apply a wood cleaner beforehand to loosen dirt and grime.
Exterior Walls and Siding
- Technique: Use a wide-angle nozzle and spray from top to bottom, maintaining a 45-degree angle.
- Tip: Be cautious around windows and doors to prevent water infiltration.
Fencing
- Technique: Clean along the grain of the wood, if applicable, using a fan-type nozzle.
- Tip: Adjust pressure settings to suit the material of the fence, whether it’s wood, vinyl, or metal.
Vehicles
- Technique: Use a gentle spray setting. Clean from the top down in sections, rinsing frequently.
- Tip: Use a foam cannon attachment for applying soap evenly.
Safety Tips and Best Practices
Personal Safety
- Wear Protective Gear: Always wear goggles, gloves, and ear protection. Closed-toe shoes are a must.
- Avoid Direct Streams on Skin: The high pressure can cause serious injury.
Operational Safety
- Check the Equipment: Inspect the washer for any damage or leaks before use.
- Be Aware of Your Surroundings: Keep children and pets away from the area being cleaned.
Environmental Considerations
- Use Eco-Friendly Cleaners: Avoid harmful chemicals that can damage your lawn or garden.
- Be Mindful of Water Runoff: It can carry contaminants into storm drains.
Maintenance and Care
- Regular Check-ups: Periodically check and service your power washer to ensure it’s in good working condition.
- Proper Storage: Drain and store the washer in a dry, frost-free area.
Glass Surfaces: Cleaning and Maintenance for Sparkling Results
Glass surfaces, from windows to tabletops, are a beautiful feature in any home, but keeping them spotless can be a challenge. Streaks, fingerprints, and dust can quickly tarnish their shine. This article offers essential tips and tricks for maintaining glass surfaces, along with guidance on effectively using DIY glass cleaners for that flawless sparkle.
Understanding Glass Maintenance
Glass, while durable, requires careful handling and regular cleaning to maintain its clarity and shine. Regular maintenance not only enhances the appearance of your glass surfaces but also extends their lifespan.
Routine Cleaning Tips
- Dust Regularly: Use a microfiber cloth to dust glass surfaces frequently, preventing the buildup of dirt and grime.
- Immediate Attention to Spills: Wipe up spills and smudges as soon as they occur to prevent hard-to-remove stains.
Tips for Streak-Free Glass Cleaning
The Right Tools
- Microfiber Cloths: These cloths are excellent for cleaning glass without leaving lint or streaks.
- Squeegee: Ideal for large glass surfaces like windows or glass doors, a squeegee can provide a streak-free finish.
Techniques for Effective Cleaning
- Avoid Direct Sunlight: Cleaning glass in direct sunlight can cause the cleaner to evaporate quickly, leading to streaks.
- Top to Bottom Approach: Start at the top of the surface and work your way down to ensure that drips don’t dirty areas you’ve already cleaned.
Simple DIY Glass Cleaner Recipes
Vinegar and Water Solution
- Ingredients: Mix equal parts distilled water and white vinegar.
- Usage: Spray onto the glass surface and wipe with a microfiber cloth. Ideal for general cleaning and removing fingerprints.
Rubbing Alcohol Cleaner
- Ingredients: Combine one part water, one part rubbing alcohol, and a tablespoon of white vinegar.
- Usage: Effective for more stubborn grime; the alcohol cuts through grease and evaporates quickly for a streak-free shine.
Lemon Juice Cleaner
- Ingredients: Mix two tablespoons of lemon juice with one liter of water.
- Usage: Great for a fresh, natural scent and gentle cleaning.
Best Practices for Using DIY Cleaners
- Test First: Always test homemade cleaners on a small, inconspicuous glass area to ensure no adverse reactions.
- Use Sparingly: Excess liquid can lead to streaks. Spray lightly for the best results.
- Buff for Shine: After cleaning, use a dry side of the microfiber cloth to buff the glass for extra sparkle.
Additional Maintenance Advice
Protecting Glass Surfaces
- Use Coasters and Placemats: On glass tables, to prevent scratches and stains.
- Regular Inspection: Check for chips or cracks that can compromise the integrity of the glass.
Addressing Common Glass Issues
- Scratches: Small scratches can sometimes be buffed out with toothpaste or a specialized glass repair product.
- Hard Water Stains: Treat with a solution of vinegar and water, or use a commercial lime scale remover for tough stains.
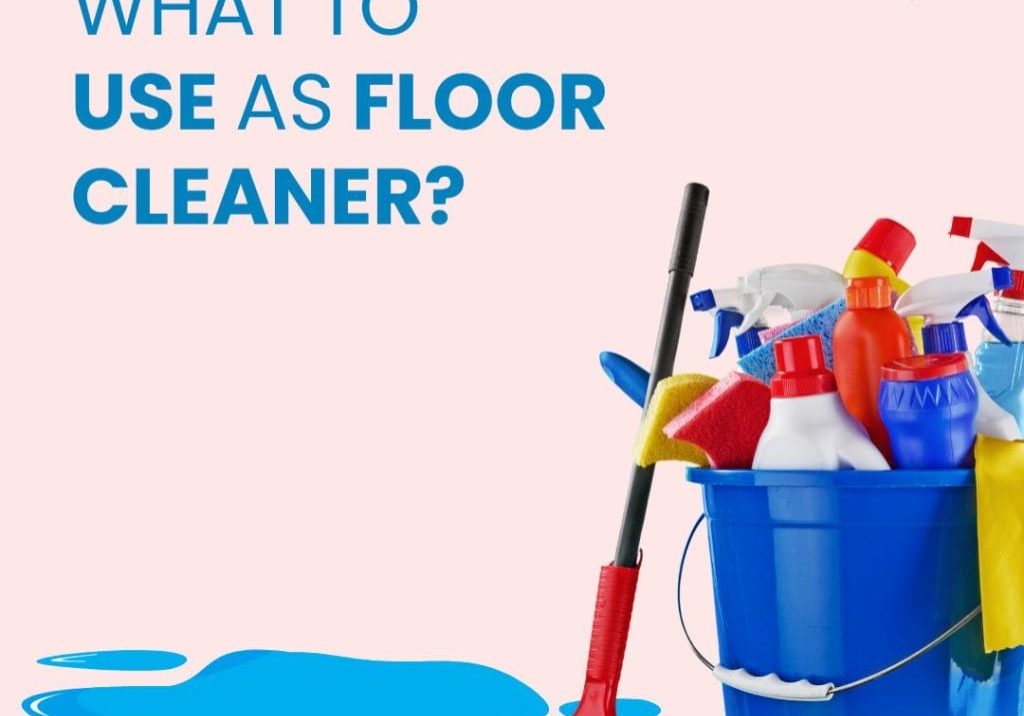
Combatting Floor Stains with DIY Solutions
Dealing with floor stains can be a daunting task, especially when they are stubborn or on delicate surfaces. However, with the right approach and some handy DIY solutions, you can effectively tackle these blemishes and restore your floors to their original glory. This article provides a step-by-step guide to managing tough floor stains and outlines best practices for mixing and using homemade stain removers.
Understanding Floor Stains
Before diving into the removal process, it’s important to recognize that different types of stains and flooring materials require different treatments. For instance, organic stains (like food or mud) behave differently than inorganic ones (like ink or paint), and hardwood floors need gentler care compared to tiles or laminate.
Step-by-Step Guide to Tackling Tough Floor Stains
Identifying the Stain
- Assess the stain type: Determine if it’s oil-based, water-based, or an organic substance.
- Consider the floor material: Tailor your cleaning method to suit the type of flooring.
Preparing the Area
- Clean around the stain: Remove any loose dirt or debris to prevent further spreading.
- Test your DIY solution: Always try your cleaning solution on a small, inconspicuous area first.
DIY Stain Removal Solutions
For Water-Based Stains on Hard Surfaces
- Ingredients: Mix equal parts water and white vinegar.
- Application: Apply the solution to the stain, let it sit for a few minutes, then scrub gently with a soft brush and wipe clean.
For Oil-Based Stains on Hard Surfaces
- Ingredients: Create a paste using baking soda and water.
- Application: Spread the paste over the stain, allow it to dry, then scrape off and clean the area with a damp cloth.
For Organic Stains on Carpets
- Ingredients: Mix one part white vinegar with two parts water and a few drops of dish soap.
- Application: Spray the solution onto the stain, blot with a clean cloth, and rinse with water.
Treating and Rinsing the Area
- Apply the solution: Use a cloth or brush to apply the cleaner gently.
- Let it work: Give the solution time to break down the stain.
- Rinse thoroughly: Remove all traces of the cleaning solution to prevent residue.
Best Practices for Mixing and Using Homemade Stain Removers
Safe Mixing
- Use non-reactive containers: Mix solutions in glass or plastic containers to avoid chemical reactions.
- Measure accurately: Follow recipes closely to ensure effectiveness and safety.
Application Techniques
- Use appropriate tools: Soft brushes for delicate surfaces, sponges, or cloths for harder surfaces.
- Gentle application: Avoid vigorous scrubbing which can damage the floor.
Post-Cleaning Care
- Dry the area well: Prevent water damage or mold growth by ensuring the area is thoroughly dried.
- Regular maintenance: Keep floors clean and address spills quickly to prevent future stains.
Advanced DIY Cleaning Tips and Hacks for a Spotless Home
Maintaining a clean and organized home is an ongoing task, and sometimes, traditional cleaning methods just don’t cut it. That’s where advanced DIY cleaning tips and hacks come into play. These innovative approaches can make cleaning more efficient and less time-consuming. In this article, we’ll explore some advanced tips and hacks for efficient cleaning, and discuss how to incorporate various techniques into a comprehensive cleaning routine.
Elevating Your Cleaning Game with Advanced Tips and Hacks
1. Maximizing the Power of Baking Soda
- Deodorize Upholstery: Sprinkle baking soda on sofas and mattresses, let it sit for an hour, then vacuum it up.
- Clean Ovens: Make a paste of baking soda and water, apply to the oven interior, let sit overnight, then scrub and wipe clean.
2. Leveraging Vinegar for Deep Cleaning
- Dishwasher Deep Clean: Place a cup of white vinegar on the top rack and run a hot cycle to clean and deodorize.
- Showerhead Detox: Soak the showerhead in a bag of vinegar overnight to remove lime and mineral deposits.
3. Utilizing Essential Oils for Fragrance and Antibacterial Properties
- DIY Air Freshener: Mix water, a bit of alcohol, and essential oils in a spray bottle for a natural air freshener.
- Disinfecting Surfaces: Add a few drops of tea tree or lavender oil to your homemade cleaners for their natural antibacterial properties.
4. Toothpaste: Not Just for Teeth
- Removing Scuffs from Shoes: Apply a small amount of white toothpaste and rub with a cloth.
- Polishing Silver: Use a soft cloth and toothpaste to polish silver items, rinse and dry afterward.
5. Harnessing the Power of Lemon
- Microwave Cleaning: Heat a bowl of water and lemon slices in the microwave, then wipe down the inside with ease.
- Stain Removal: Apply lemon juice to stains on countertops, let sit, then scrub lightly.
Incorporating Techniques into a Comprehensive Cleaning Routine
Streamlining Your Cleaning Process
- Daily Mini-Cleans: Integrate small cleaning tasks into your daily routine to prevent buildup and save time.
- Weekly Focus Areas: Dedicate each day of the week to a specific area or task, such as Mondays for bathrooms, Tuesdays for dusting, etc.
Combining Traditional and Advanced Methods
- Start with Decluttering: A tidy space makes for easier cleaning. Incorporate this as your first step.
- Follow Up with Deep Cleaning: Use the advanced hacks for tackling specific areas after the general cleaning.
Customizing Your Cleaning Toolkit
- DIY Cleaning Products: Create a set of homemade cleaners for different surfaces and purposes.
- Organizing Supplies: Keep your cleaning tools and products in an easily accessible caddy or cupboard.
Seasonal Deep Cleaning
- Plan for Seasonal Shifts: Integrate deeper cleaning tasks, like cleaning under furniture or washing curtains, with the change of seasons.
Conclusion
The journey of mastering DIY cleaning is about more than just maintaining cleanliness; it’s about cultivating a healthier, safer environment for you and your loved ones. By adopting eco-friendly and homemade solutions, you contribute positively to the environment while ensuring the safety and well-being of your household. The innovative techniques and tools discussed, particularly the versatile power washer, open up new possibilities for tackling cleaning tasks with ease and effectiveness.